A Simple Guide: Growing Onions in a Container

Gardening can be a fulfilling endeavor, particularly when you see the fruits of your labor at the dining table. It feels even more rewarding when you get to grow your own ingredients right at your own home. One of these key ingredients that can be grown conveniently in containers is the humble onion. This piece will guide you on how to cultivate onions in a container, straight from the selection of the right onion variety and container, to the intricacies of the planting process, and finally the rewarding step of harvesting.
Choosing the Right Onion Variety and Container
Unearthing the Best Onion Varieties and Containers for Container Gardening
In its simplest form, gardening is an exhilarating journey, calling out to the innate nurturer within us while rewarding patience and persistence. You’ll agree that nothing beats the taste and freshness of homegrown onions. However, for many living in urban settings with limited or no garden spaces, container gardening comes as an ingenious solution. If you’re on the lookout for suitable onion varieties and the right containers for container gardening, you’ve come to the right place!
First off, it is essential to understand that not all onion varieties are created equal. When it comes to container gardening, the choice of onion varies significantly. Amongst the numerous varieties available, the short day, intermediate day, as well cropping onions are particularly well suited for container gardening.
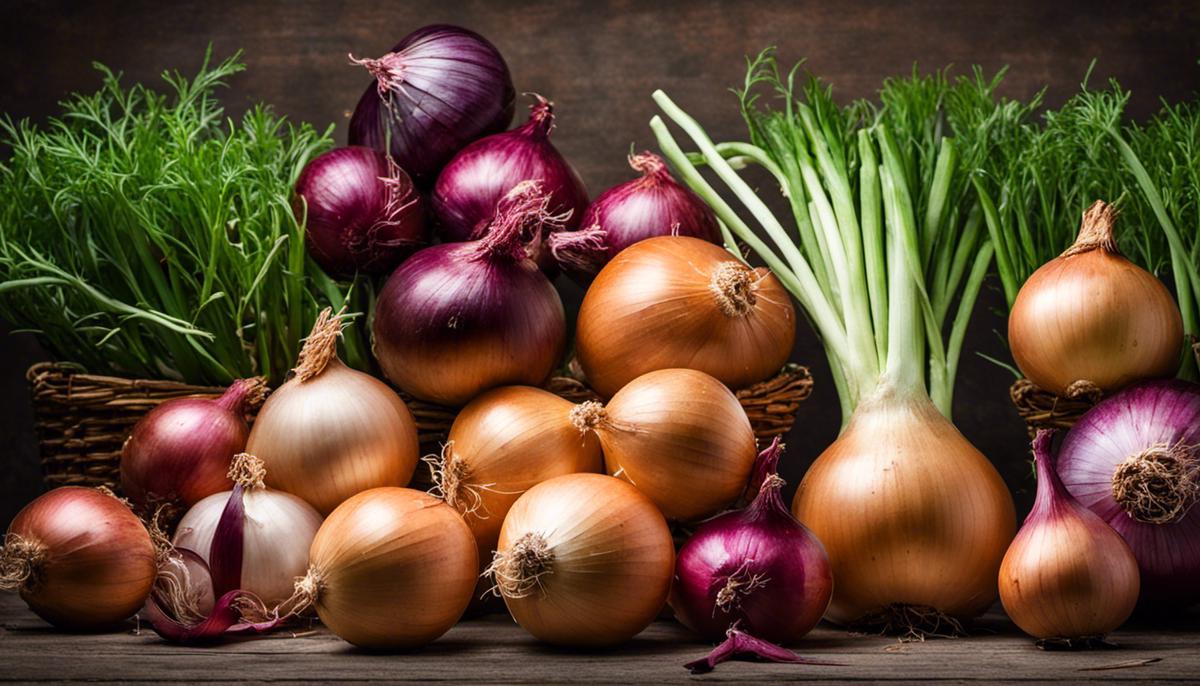
Short-day onions are perfect container-growers, harvest-ready in just over two months, and include varieties such as the Red Burgundy and White Bermuda. These varieties develop bulbs with only moderate daylight, and typify ease for beginners.
For gardeners looking to experiment, intermediate day onions like Red Candy Apple and Super Star are a great fit. With a maturity rate of just 80 days and a larger size than short-day varieties, they offer an appealing alternative. Plus, these varieties are noted for their sweet flavor, making them a go-to for many gourmands relishing in home-grown produce.
Then we have the cropping onions, like Bunching/ Spring Onions. Being small and swift to grow, these are ideal for pots and can be frequently harvested.
But, deciding on the perfect onion variety is only half the battle. Good container selection is equally critical for a thriving garden, impacting factors like water retention, root development, and overall plant health.
Always remember, when picking a container, depth is more important than width. Opting for a deep container, around 10 inches or more, keeps the blooming onion bulbs from being cramped. Pick containers with good drainage to ensure the roots won’t get waterlogged.
Plastic containers are lightweight and relatively easy to move, accounting for their popularity. However, be aware that they may degrade over time, especially if left in the sun. So, protecting them or expecting to replace them over the years is wise.
Clay or ceramic containers are heat-tolerant and more robust, making them perfect for outdoor settings. Yet, they can be heavy and more delicate than plastic ones, so they demand careful handling.
Wooden containers, on the other hand, are an all-natural, eco-friendly alternative to plastic. They offer excellent insulation for the soil but may decay over time.
At the end of the day, enthusiastic gardener, it’s all about trial and error, adaptation, and refinement. Whether you’re a green-thumbed veteran or a budding gardener, the adventure of growing home-harvested onions in containers brings countless joys and tasty rewards. So go ahead, pick a variety and container that resonate with your conditions and preferences, and embark on your container gardening journey. Green dreams!

Photo by lmablankers on Unsplash
Onion Planting Process
Plunging headfirst into the exciting venture of planting onions in a container is an amazing experience! In continuation of what we love — container gardening — let’s dive right into the step-by-step procedure of growing onions in containers. This well-loved allium may seem like a challenging undertaking initially but will reward you plentifully with its aesthetic beauty and culinary delight.
To begin, good onion starts or sets are crucial. Choose onion starts that look robust and healthy, preferably from nurseries or gardening centers that specialize in vegetable gardening. Make sure these onion starts have plump bulbs and firm roots.
Once your onion varieties and the perfectly suited container are chosen, let’s assemble the necessary soil. Onions thrive in well-drained, nitrogen-rich soil. A blend of good-quality potting soil and compost gives your onions the best environment for growth. If you have a composter at home, kudos! If not, readily available compost from gardening stores works just fine.
Now that our components are gathered, it’s time to start the planting process. To start, fill up your chosen container with the soil-compost mixture, leaving about an inch or two from the top.
Next, create shallow holes for your onion starts or sets. Normally, the distance between the onion sets depends on the onion type. However, for container gardening, space the onion sets three to four inches apart with the roots facing downwards. Each hole should be about one to two inches deep. Once these onion sets are in placed, cover them gently with the soil.
Watering is essential once the onions are planted. The soil at this stage should remain consistently moist, but not waterlogged. A light watering after planting along with regular daily watering should be sufficient.
After about three weeks, fertilizer application can significantly boost onion growth. A slow-release balanced fertilizer like 10-10-10 (N-P-K) applied every few weeks until the onions start to bulb can work wonders.
Onions love sunlight. Make sure that your container is positioned in a location that gets at least six hours of direct sunlight each day.
Harvesting onions is another riveting experience. It’s signal to harvest when the tops become yellow and start to fall over. At this point, refrain from watering and let the soil dry out. Then pull the onions from the soil, let them dry for a few days in a shaded, dry and well-ventilated area. This hardens their outer layers which aids in storage.
Recap: Choose healthy onion starts, get your soil right, plant them correctly, give them enough sun, fertilize periodically and voila! You’ve got an abundance of onions grown right in your backyard or balcony. Now, you are not only the container gardening enthusiast but also the onion-growing master.
Bear in mind that container gardening, like any other hobby, is a journey. There might be bumps along the way, but perseverance and patience certainly pay off. Happy gardening!

Maintaining and Harvesting Onions
Cracking on with some specifics, did you know that maintaining your container onions with precision can heighten your culinary experience? Let’s learn just how to do that.
First, pay close attention to the growth of your onions. Onion leaves originate from a compressed stem called a ‘plate’. When your onion starts to form a bulb, leaves grow larger and begin to fold at the neck – this indicates optimal health! Observe the leaves, they’re your indicators of bulb development.
Watering your onions adequately is crucial. Onions have shallow root systems, hence require consistent watering for optimal growth. However, exercise caution! Overwatering could result in bulbs rotting. Water drainage also plays a critical role in maintaining onions. Ensure your previously chosen container has good drainage. Maintain soil moistness, but never sodden.
Next, optimal sunlight exposure provides a beneficial environment for your onions. While we already stressed the importance of placing containers in areas receiving at least six hours of sunlight, adjusting the position of your containers to follow the sun’s path could be beneficial, especially if your space doesn’t offer consistent sunlight.
Pests and diseases could potentially pose a threat to your onion growth journey. Regularly monitor your onions for signs of pests or disease. If signs persist, treat them using eco-friendly pesticides or fungicides, or opt for natural remedies.
Now for the fun part: harvesting your onions! Generally, onions are ready for harvest once their tops have yellowed and started to fall over – typically around five months from planting. For sweet onions, harvest even earlier as sweet onions don’t store well.
Gently pull or dig your onions out from the container – oh, the joy of reaping your rewards! Ready to store? Ensure harvested onions are properly cured. Curing involves drying out the onions to prep them for storage. Spread your onions out in a well-ventilated, shady spot for about two weeks, or until the necks are completely dry. Be sure to handle your onions gently during the curing process to prevent bruising.
In the world of container gardening, maintenance is key. Knowledge is power, and understanding your crop can multiply your yield exponentially. Patience is your gardening companion! Embark on this journey of discovery, watch the life cycle unfold and savor the fruits (or should we say onions) of your labor.

With the right approach, techniques, and patience, anyone can harvest their own onions right at home. Give your culinary creations a personal touch by using home-grown onions, harvested at the peak of their flavor and nutritional profile. A meticulous maintenance routine is also vital, which includes regular watering, prompt fertilizer application, and diligent pest and disease management. So, get your hands into the dirt and embark on an empowering journey of self-sustainability. Remember, the joy in harvesting onions is not just in the end product, but in every bit of the process that leads there.


